On this page
1. Finding the Plugin Hub2. Reading a plugin's listing3. Installing: a three-step consent flow4. Configuring an installed plugin5. The "Installed" tabWhat this walkthrough didn't coverWalkthrough
This is a real, click-through tour captured against the branch sandbox, logged in as the seeded owner user (Owner · All Permissions) of the demo clinic. It installs and configures the one plugin that ships pre-seeded on every sandbox: Demo Appointment Reminders, a fictional reminders integration used as a working reference (packages/server/src/generateServerData/seedDemoPlugin.js).
1. Finding the Plugin Hub
The Plugin Hub lives under Settings → Plugins in the clinic sidebar (icon: a "blocks" glyph), at the URL /plugins. It only appears for a user with the viewPlugins permission, and only when the FEATURE_PLUGIN_HUB flag is on.
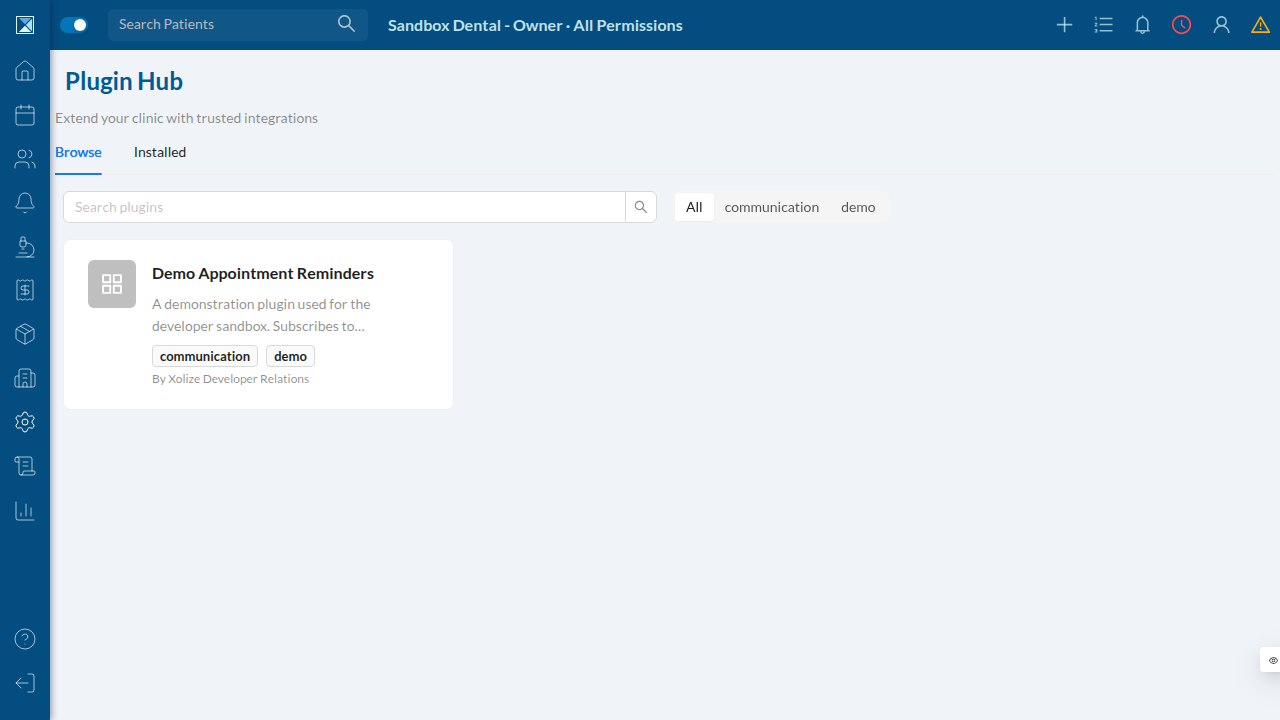
The Browse tab lists every published plugin, with search and category filters. Right now the sandbox has exactly one: the demo plugin, tagged communication and demo.
2. Reading a plugin's listing
Clicking the card opens the plugin's detail page — everything a clinic owner needs to decide whether to trust this plugin with their data.
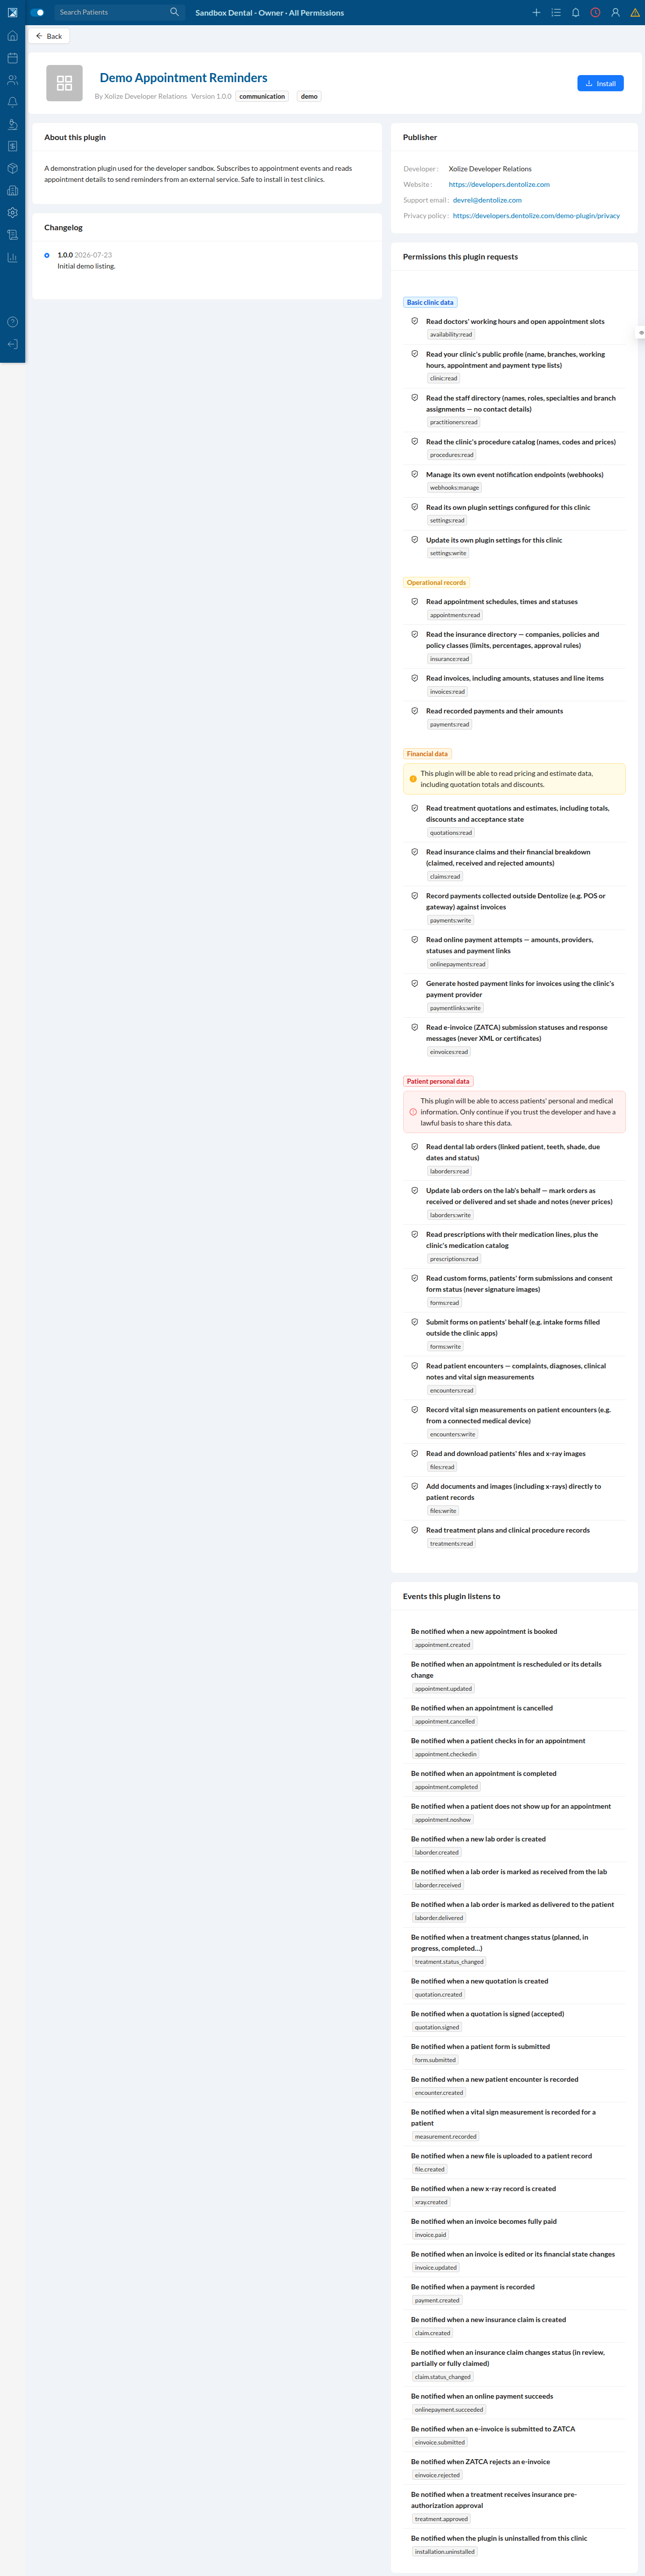
Note the "Permissions this plugin requests" panel: every requested scope is grouped under a sensitivity heading — Basic clinic data, Operational records, Financial data, Patient personal data — with a plain-language sentence per scope, not just the raw scope string. The financial and patient-data groups carry an explicit warning banner. Below that, "Events this plugin listens to" lists every webhook event the plugin will be notified about, also in plain language.
3. Installing: a three-step consent flow
Clicking Install opens a wizard — Access → Data agreement → Done — rather than a single confirm button.
Step 1 (Access) repeats the same scope/event breakdown from the detail page, so the last thing the owner sees before committing is exactly what they're granting. Consent is all-or-nothing: there's no per-scope opt-out checkbox.
Step 2 (Data agreement) is the DPA (data processing agreement) step:
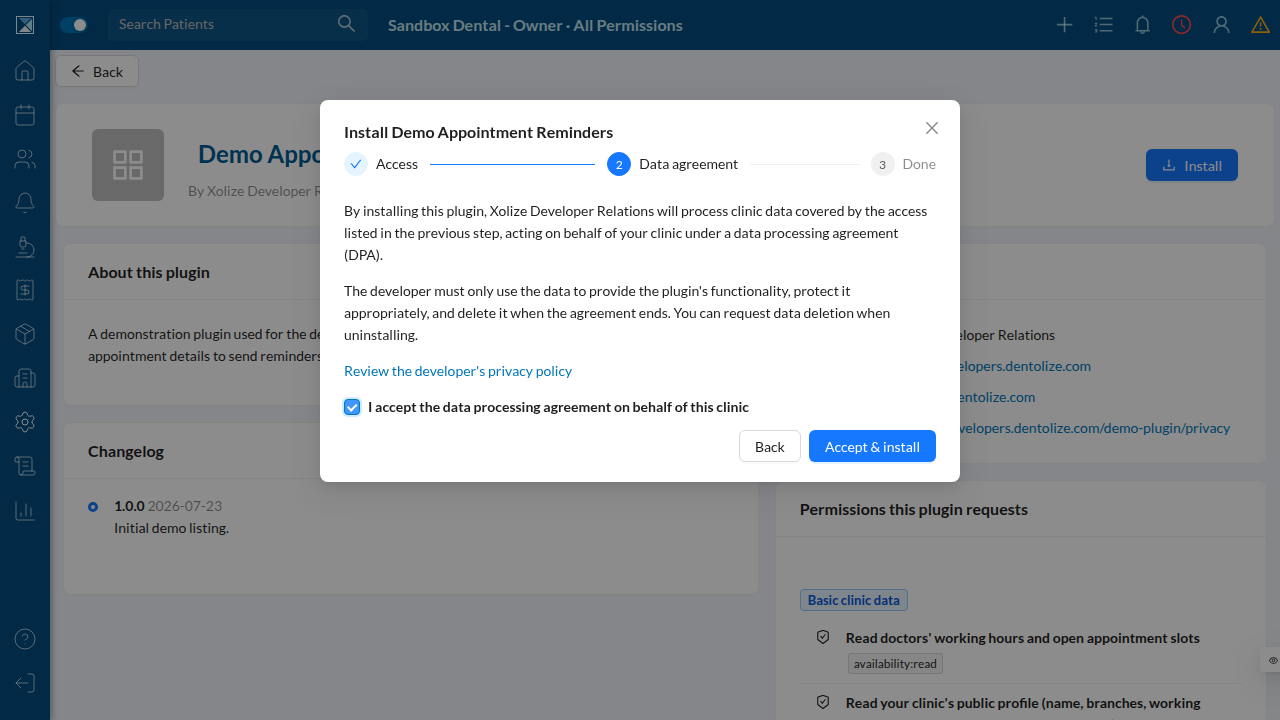
The Accept & install button stays disabled until the checkbox is checked. This isn't cosmetic — the timestamp and user of this click are recorded permanently on the installation record.
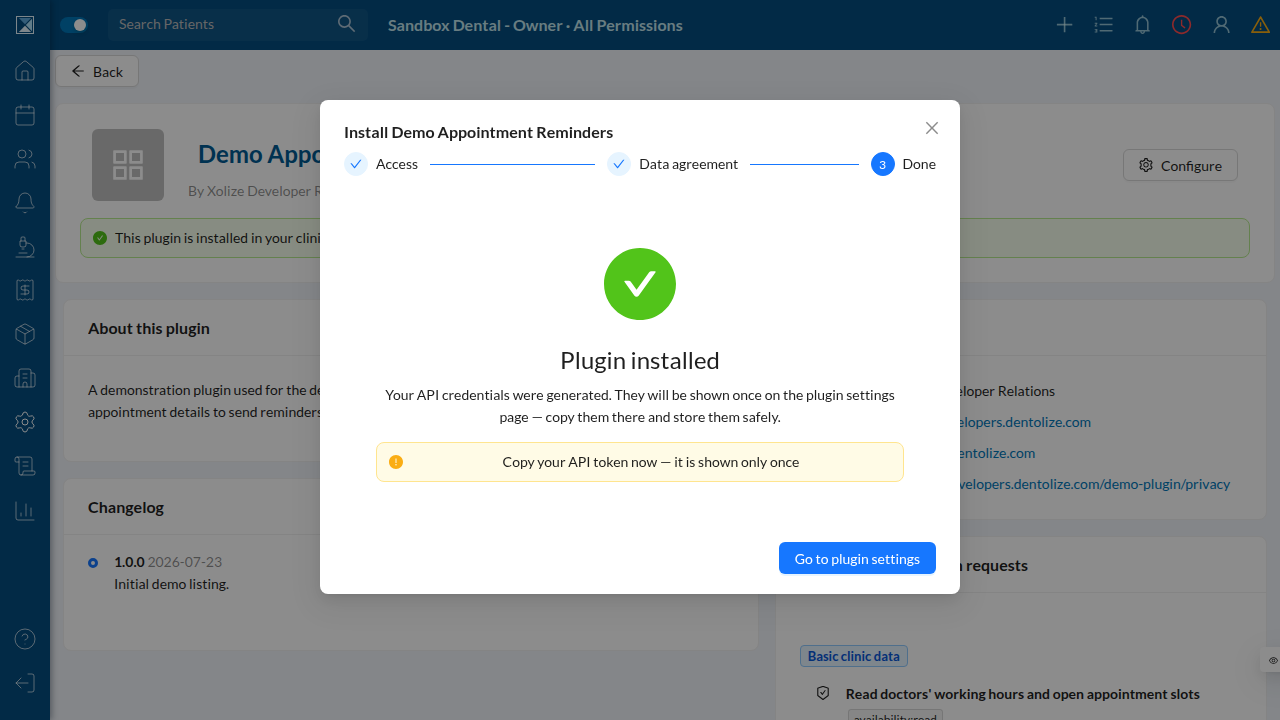
Step 3 (Done) confirms the install and warns that the API token is about to be shown exactly once:
4. Configuring an installed plugin
Clicking Go to plugin settings lands on /settings/plugins/demo-appointment-reminders, a four-tab screen: Settings, Connection, Activity, Danger.
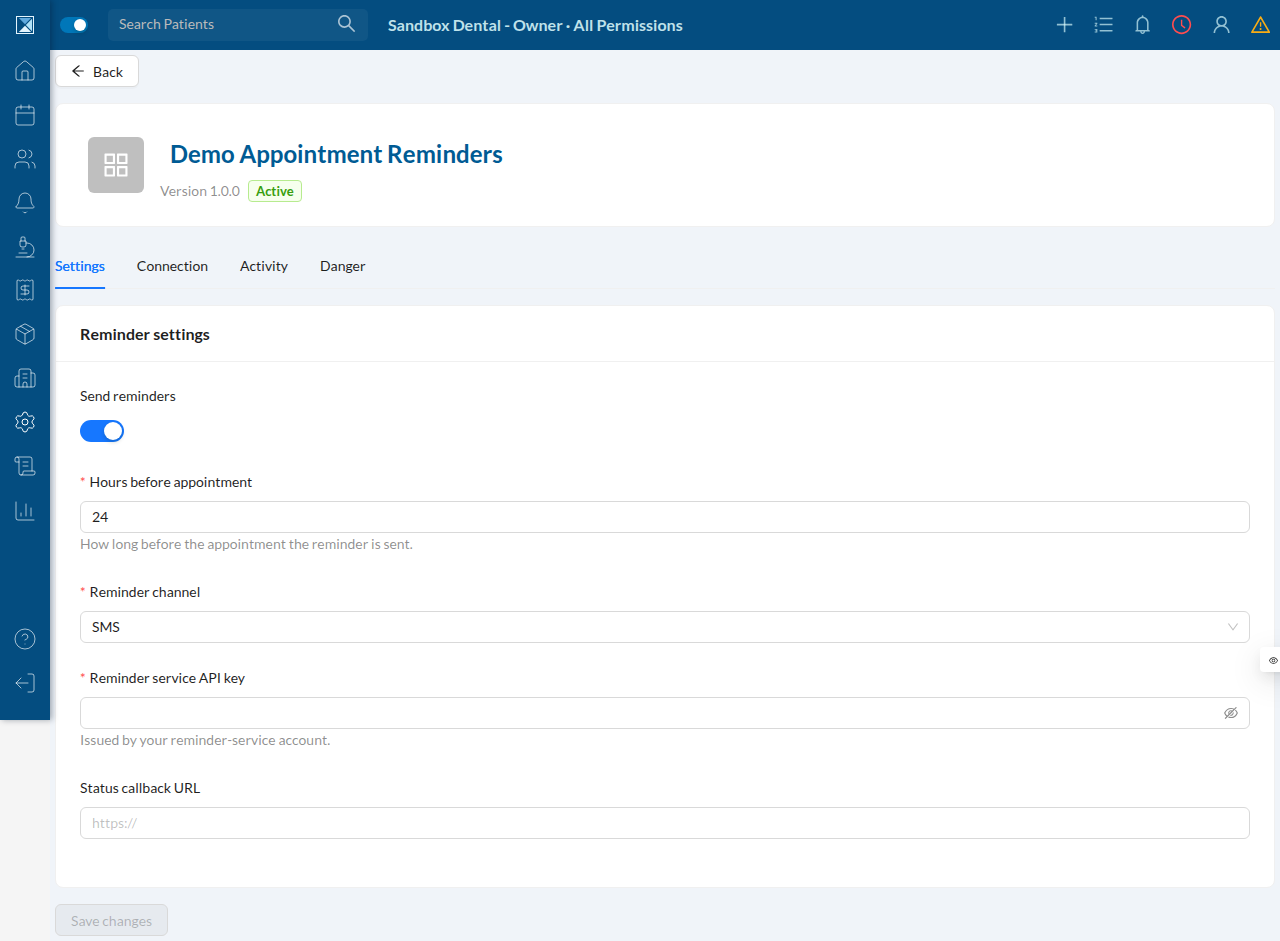
Settings — the plugin's own configuration form
This plugin declares a settings schema with a toggle, a number field with min/max validation, a select, a secret field, and a conditionally-visible URL field — all rendered natively, no iframe:
Connection — API tokens and webhook endpoints
This is where the one-time secrets actually get shown, and where the clinic manages its side of the integration:
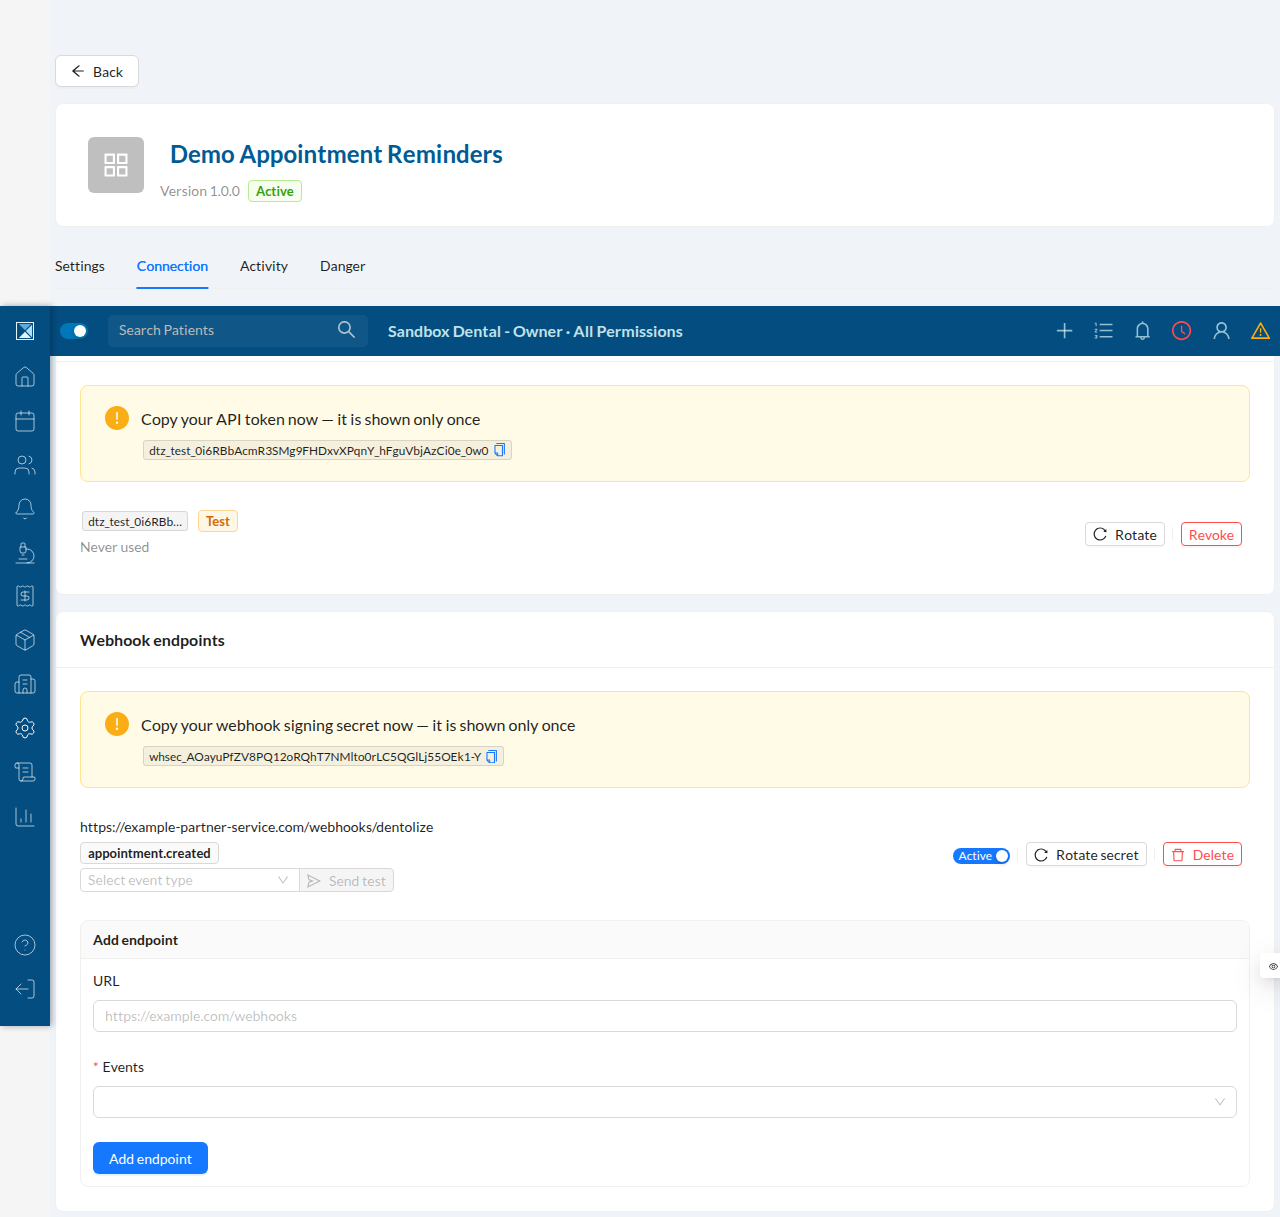
The API token (dtz_test_… here, since this is the sandbox) is shown once in a dismissable banner and then only ever displayed as a masked prefix afterward. Adding a webhook endpoint (URL + which subscribed events to deliver) mints its own one-time-shown signing secret (whsec_…), independent of the API token. Once added, the endpoint row exposes Rotate secret, Delete, an Active toggle, and a Send test control scoped to that endpoint's subscribed event types.
Sending a test event for appointment.created against a URL that doesn't actually exist (as expected, in this walkthrough) produces a real, failed delivery attempt — visible on the next tab.
Activity — the delivery log
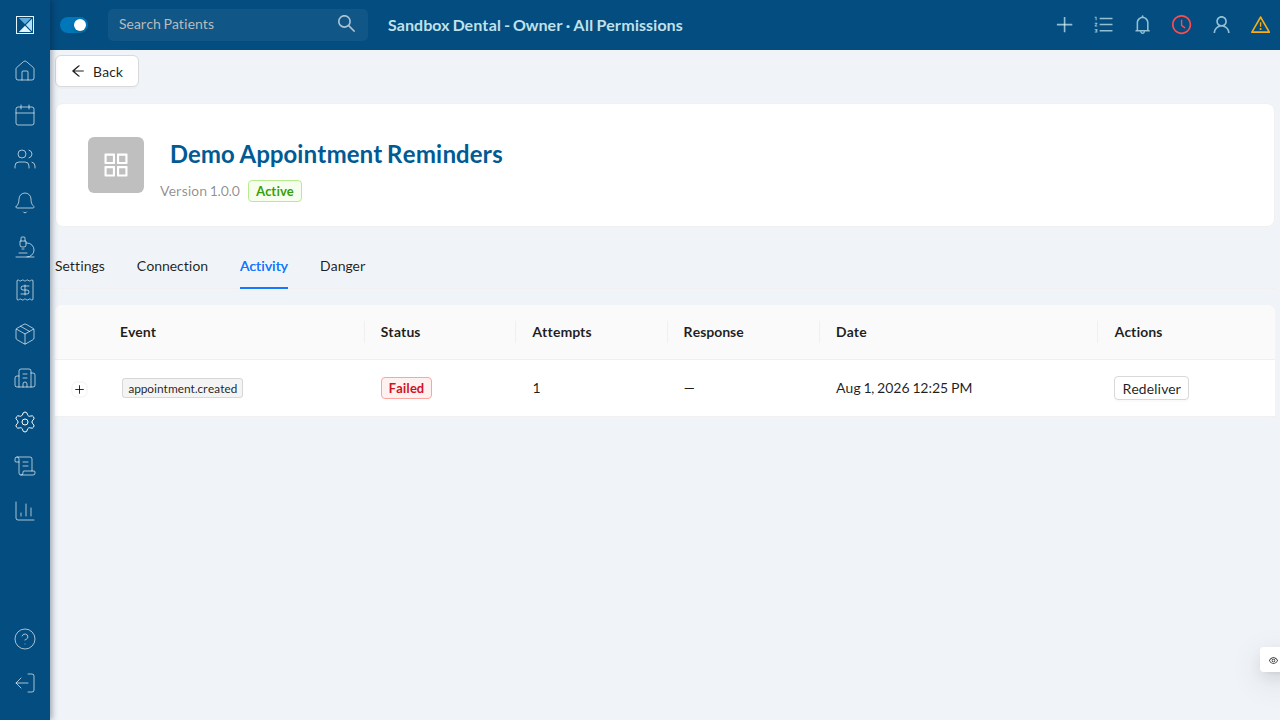
Every webhook delivery attempt is logged here with its status, attempt count, and HTTP response (when one came back), with a manual Redeliver action per row. This is the same table the platform's automatic retry pipeline writes to — nothing here is walkthrough-only tooling.
Danger — uninstalling
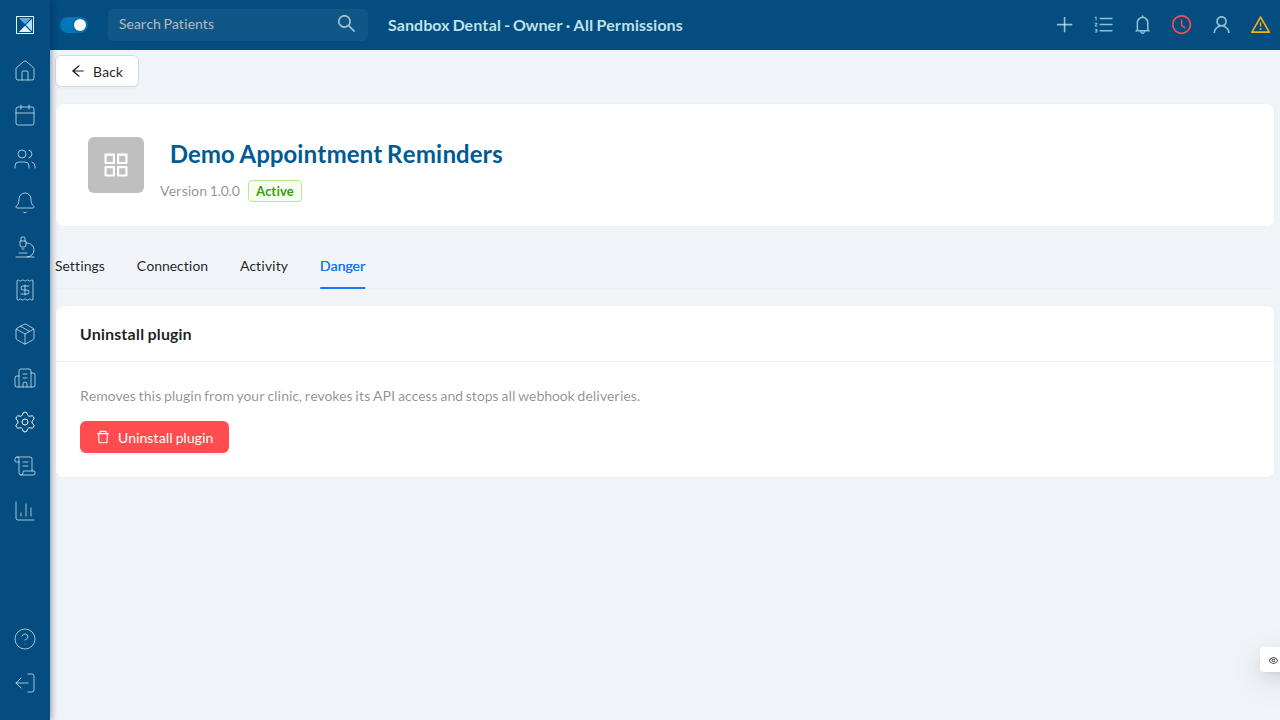
There is deliberately no "disable" or "pause" action here — only full uninstall, which immediately revokes API access and stops webhook deliveries. Uninstalling asks the owner to type the plugin's slug to confirm and offers a "request data deletion" checkbox (a request forwarded to the developer, not a technical guarantee).
5. The "Installed" tab
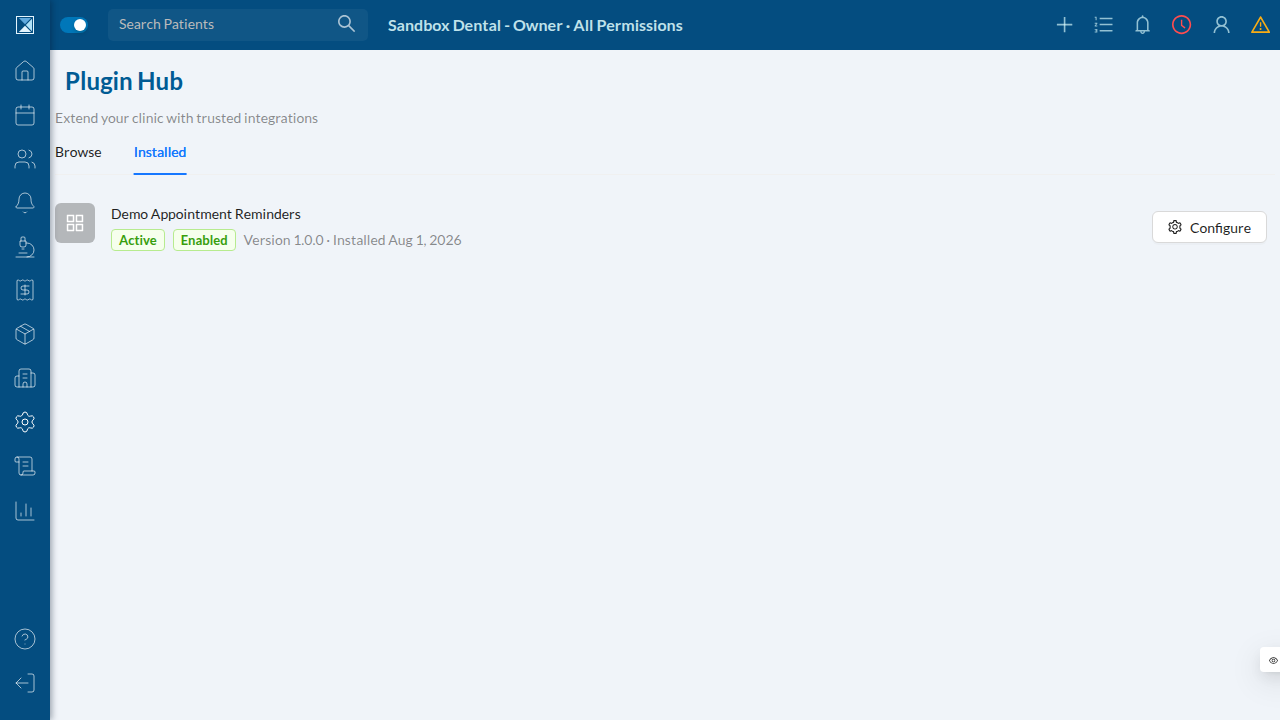
Back on the hub, the Installed tab lists everything the clinic currently has, with quick access to Configure:
What this walkthrough didn't cover
The internal Xolize plugin registry admin tool — where listings are created, scopes/events are assigned, settings schemas are authored, and plugins are published or suspended — lives behind a separate, non-public admin URL (/ZROYKuKEVCvQykPlS4kP/plugins) with its own login. It was not reachable from this sandbox session (the admin login got stuck in a loading loop rather than rendering); that screen is documented from source in Plugin registry (Xolize admin) instead, based on a full read of AdminPlugin.js and AdminPlugins.js.